#diy button
Explore tagged Tumblr posts
Text

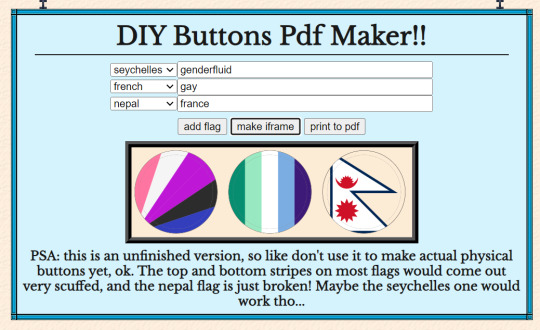
i made an upgrade to my flagmaker so it can be used to make templates for those DIY button making presses. it's hardcoded to use 50mm for now, but i want to add more options in the future. also need to fix the flags getting cut off my those circular margins
160 notes
·
View notes
Text


battle vest update :3 first post here!
everything made by me: skeleton snake patch, long term health danger patch, biohazard patch, good boy/paw print buttons, disco elysium button, fish "organise" patch
41 notes
·
View notes
Text

teehee... a button of me :)
#i had to trim it a bunch to fit in the thingy but i like it!!!!#furry art#sfw furry#furry artist#art#traditional art#diy button#idk how to tag this#i need a proper button maker fr#fursona button#fursona
48 notes
·
View notes
Text
youtuber/tiktoker/whatever-type-of-video-influencer marinette, where she makes crazy DIY and craft videos and debunks fake content-farm DIYs. she has a modest but loyal mass of followers that grow by the day as her crafts get increasingly intricate and cool. she catalogues all of her mistakes and is very earnest about the process. adrien falls asleep to videos of her sewing and making cool containers and explaining the mechanisms of the strange devices she makes
#lots of fashion and sewing of course but other crafts as well#i think a lot about how marinette made that box that she keeps the miraculous box in#the giant sewing box with a secret drawer that can only be accessed through by inputting a code into hidden buttons#like. that's a whole ass device w mechanisms and everything. girl is an all around DIY queen#buggachatter
5K notes
·
View notes
Text
The aluminium from the cans was very sharp so I had to be careful not to get a cut, but other than that it was pretty easy
Tiktok i just found with a hack on using the bottoms of old cans as the base for diy buttons. Make sure to cover the sharp edge with something!
#ive started using tiktok again as a lil treat#god its embarrassing when my ass comes on here and is like GUYS LOOK AT MY TIKTOKS#punk#diy#diy pins#buttons#pins#diy buttons#recycling#upcycling#accessories#handmade#diy punk#punk diy#diy or die
2K notes
·
View notes
Text

assortment of pins with a general "fuck off" sentiment
#punk diy#pins and patches#diy pins#bottle cap pins#upcycling#my art#button pins#alternative fashion#punk fashion#punk pins#diy#transmascs and dog boys this one is for you
454 notes
·
View notes
Text

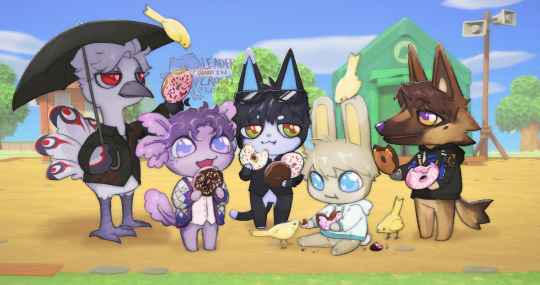
Lads x Animal Crossing x DONUTS
#love and deepspace#animal crossing#I needed a new bsky twt header#and needed to add Caleb to ac#tweaked the designs of the others a lil#since bugs wouldn’t dare bother Sylus each time he knocks a wasp nest out of a tree they go after whoever is closest#Caleb’s always got a diy recipe for you#Zayne waters all ur flowers#you keep giving him stuff to wear but he’s always in the black button down#Rafayel always has a lil exclamation point or thought bubble#and does a lot of Naruto running#Xavier loves ur museum#thoughts from the discord
229 notes
·
View notes
Text


Made some button pins! They turned out great, now all that’s left is to put in some safety pins.
#diy or die#diy projects#recycling#diy punk#punk diy#queer punk#pins#button pins#green day#bottlecap pins#bottle caps#can tabs#can tab project#can tab craft
187 notes
·
View notes
Text


an attempt was made ⭐️

#if u can’t buy it diy it etc.#anyway need to dry and be ironed for stick and then this baby is coming to work with me#mine is a lil tubbier but i love his pötsi in fact i prefer my version hdjdjsjk#moomin#my creations#personal#plus i gave him a belly button bc it felt missing hdjdks
152 notes
·
View notes
Text

A few buttons and bottle caps to attach on the something
#art#pins#buttons#bottle caps#diy punk#diy fashion#eyes#anarchist#spiders#my art stuff#my art#chaos crow arts
235 notes
·
View notes
Text

Added some of my buttons from my collection :]
271 notes
·
View notes
Text

#ethan speaks#I'm unstoppable with a button maker#this is like half of what i made so far#diy or die
130 notes
·
View notes
Text


First post hi! Im gonna mostly post my diys on here and some outfits. These pics have the bag im working on, my beanie, and my soda tab wallet chain! This outfit is called trying to stay warm when you live in florida and rarely experience winter. My summer outfits are much cooler, promise
#punk#crust punk#d beat#diy punk#punk fashion#punk girl#diy#detestation#tragedy#punk patches#outfits#patches#button pins#discharge#aus rotten#cat photo bomb#his name is fish
70 notes
·
View notes
Text
I made a bracelet out of the waistband of the jeans I've been cutting up for repairs and patches


I saw someone awhile ago that embroidered and painted some of their own bracelets and wanted to give it a shot myself, I also love all the centipede patches I've seen around on the diy punk tag and wanted to make one for myself!

I also made him glow in the dark and my wife gave him some cute eyes and details that only show up when he's glowing!

#diy punk#diy or die#i love the button i put on it#i think it looks like a rock that he likes#and hes holding it when the bracelet is fastened#i wasnt sure about adding the embroidery along the sides but it really completes it#ive also found i really enjoy wearing bracelets#otherwise i wouldnt have made this lol#i have a thick leather one a braided cord one and a spiked choker i double up to make into a bracelet#im excited to wear this out!#id in alt text
58 notes
·
View notes
Text


SHOP OFFICIALLY CLOSING ON MONDAY!
30% OFF FOR EVERY ORDER OVER $10, GET PATCHES, JEWELRY, BUTTONS, OR EVEN A HAND-PAINED JACKET WHILE YOU STILL CAN!
This is the last call for my etsy shop!! It's going down and not coming back.
It's been wonderful sharing my art with you all! I'll still be drawing and taking the occasional digital art comm, but if you see me selling this kinda stuff again it'll probably mostly be locally/at irl craft fairs if anything at all?? No promises!! I wanna focus on creating for myself going forward <3
ETSY SHOP || TIPJAR
#shop tag#etsy#etsy shop#punk#queerpunk#pride#leather#denim#denim jacket#hand painted jacket#the magnus archives#the stranger tma#rats#arson#furry#neon#skulls#trans pride#pronoun buttons#indigenous artist#black owned business#weird#diy#patches#handprinted patches#screenprinting#blockprinting#jewelry#bro idk what to tag this shit anymore
138 notes
·
View notes
Text


The people need to know ƪ(˘⌣˘)ʃ via FridgeGoods on etsy
#i made these!! >:)#a couple ppl on here know ive been slingin buttons since day 1#lgbt#queer#lgbtq#gay#asexual#trans#lesbian#nonbinary#lgbtqia#pride merch#artists on tumblr#crafts#diy#diy craft
71 notes
·
View notes